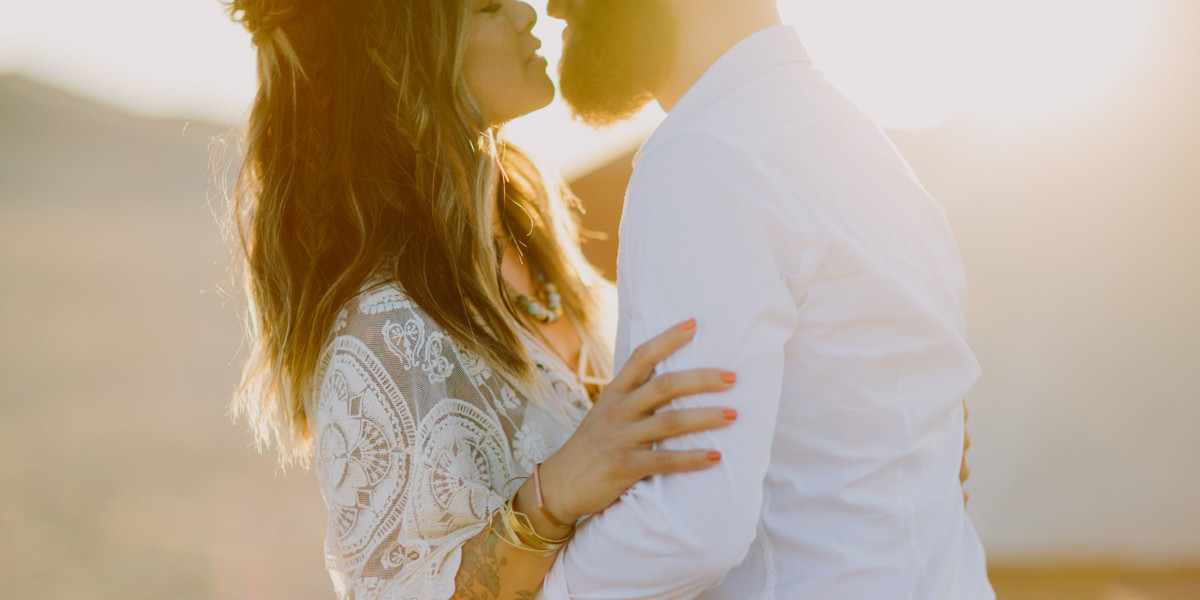


Alright, y’all. This post is simple. It’s about understanding light and the huge difference it makes to your photos. Lighting as a concept worthy of discourse probably made you crinkle your nose up in distaste, so let me assure you that in this post, I’m absolutely not trying to teach you the ins and out of how flash lighting works, or metering on cameras, or anything else that sounds technical and tricky. This isn’t a post for photographers, it’s a post for people who are hoping to have the best wedding or session results. People who want photos that look lovely/magical/dreamy. Folks who would like to avoid feeling sweaty or uncomfortable on their day. Or for that matter, people who want their guests to be comfortable, too. Yep, I’m gonna keep it simple for you folks, but the gist is this: when picking out a place for your ceremony, or a location for portraits, or a time of day to schedule something, lighting matters. It’s an unsexy idea to non-photographers, but to those of us behind the camera, it’s the very core of what we do to make things their very most magical.
We really, really care about giving you the best possible portrait session or wedding experience we can, and lighting makes a huge difference in your comfort, and how things appear. But let me first get this out of the way: there is no right or wrong lighting condition. Anyone that suggests there is a wrong choice is simply not adaptable. We can of course shoot in any light! But the results will be dramatically different in different conditions. So today’s post is to help you to be informed about what to expect at various times of day, in various lighting conditions, so you can make the best choice for you (full disclosure: we definitely have preferences!). I’m using exclusively color images of human beings (and not landscapes or details) so you can compare apples to apples.
Okay, then. We’re all ready for this? Let’s begin!

Time of day is one of the number one aspects in planning your wedding day (or scheduling a session) that will impact how your photos look. To break it down super simply: the position of the sun over the course of the day will create very different lighting of the exact same location. First off, we have:
MIDDAY LIGHT
Let’s start with midday light. The sun is directly above you, so it casts down right above your head. That means high-contrast bright spots and dark spots, and harsh shadows cast by your very own facial features (eyebrows or noses cast shadows below them creating dark circles where you might not want them). Generally, it’s much hotter at this time and the sun’s presence will make people feel that heat much more. It can also cause people to get squinty, and you guess it, sweaty. Like I said, we can shoot in any lighting conditions, but this one is definitely the harshest and highest contrast. Tree cover/shade can absolutely change this, so keep in mind we’re talking about full sun with no shade. Here are a few examples of what this looks like. Reminder: pay attention to the shadows on their faces and the hot spots (e.g. points on the skin that are just pure white) as a key indicator of stark light conditions.
In the images you see below, these events all happened somewhere between noon and 3pm. Since the sunset time changes depending on time of year, instead of naming a specific hour, we can loosely we can say that these images all happened around 4-6 hours before sunset. We call this harsh or high-contrast light. Most of these are from ceremonies because with portraits we have more flexibility about choosing a gentler light at a later time of day, so when we shoot portraits we usually aim to schedule them later or seek out shade.


Now, let’s skip to several hours ahead.
LATE AFTERNOON LIGHT
This kind of light is also often referred to as Magic Hour Light, Sunset Light, or Golden Hour Light. It’s a much softer/gentler light. The sun is a lot lower in the sky so it’s simply less intense. Because it’s lower it will not cast the same harsh shadows, and the strength/power of the light is diminished, so instead of lighting up faces with a bright bold yellow, orange, or white, you’ll see that skin softens up to more pink/coral/pastelly tones.
We tend to consider this light more flattering because it does not cast harsh shadows on faces, and makes skin look a little less stark. This light begins to appear around two hours before sunset, but gets really gorgeous in that final hour leading up to sunset (and in the 10 minutes past the sun disappearing). This is normally the period of time we try and schedule most portrait sessions and on the day of the wedding, we try and take advantage of this light for portrait time as well, when possible. Something you might notice is the way this light catches the contour of a person’s body or hair in a golden manner, or how it can create a hazy golden pink glow in the background that surrounds the subject.


“But Jasmine, what if the sun doesn’t come out on our big day?!” Don’t worry fam, I gotchu. This brings us to:
FILTERED LIGHT
In these conditions, either the sun is hidden behind clouds, buildings, trees, or other method of shade-creation in which there is no strong light source. Photographers LOVE shade because every angle is flattering since there are no points of harsh light, and it makes it easy to shoot at ANY time of day! I know most couples tend to be keen on the idea of a sunshiney wedding day, but I am happy to report that filtered light offers some major benefits including reduction of heat issues, comfort of all parties who would have otherwise been sitting in the sun, easy shooting from any angle, and plenty of other little reasons. It tends to be a little bit like golden hour light in its softness, but there is much less glow, and more neutral tones with the light evenly distributed. Here are some examples of filtered light in action:


And finally, the light in the dark (eg: nighttime!)
ARTIFICIAL LIGHT
This is the kind of light that most often worries clients when they initially reach out… they ask if we’ll even be able to shoot at night in a dark room or a dimly lit garden. “Are twinkle lights sufficient?” “Will our darker skin make us disappear in photos?” “We want it to be romantic, but will it be too dark for photos?”
The answer to all of these queries is that we’ve got you covered. Even in darker scenarios, we can take good care of you, because we either will draw on the ambient light (the existing light in a location such as market lights, candles, overhead lighting, etc), or we’ll set up our own set of lights to brighten things up as needed. These are flashes that we position on stands throughout the room/beach/venue/wherever you are, so that we can distribute light where we need it when we need it. They only go off when we click our camera shutter, so not to worry if you want to keep things moody and romantic, they won’t add continuous steady light to your venue space. Just a pop here or there.
Ambient light is softer and usually warmer (think of the warmth of candlelight, it has an orangey glow, right?). It’s often a much darker/moodier vibe. We love ambient but often it’s not enough to create crisp and quality images. So we’ll add our own flashes to the mix, which are powerhouses that produce lots of light. This light is generally a little more high-contrast/strong but we have the ability to control it in myriad ways, so it looks just how we want it to, in order to reflect your day beautifully. But keep in mind that if you have little to no ambient light, it dramatically changes the mood of your space. We always encourage clients to add ambient light (such as market lights or uplighting) to really dark spaces.
Here’s how ambient light looks at night:


And in contrast, here’s how flash looks at night. Note how many different ways we can use our flash gear, from mimicking low-key golden light, to starry skies, to even light, to creative light trails on the dance floor:


This is one of the most often-overlooked questions my clients face while planning: what will the light be like at X location at Y time? You might have visited your venue at 5pm in March and loved the way the light looked then, but if you’ve scheduled your ceremony for 2pm in August, it’s going to look really different. This is because the sun changes position both depending on the time of day, and the time of year. So I wanted to go over a few pointers you can keep in mind while you’re planning the exact timing and location of things (especially your ceremony since that tends to be the most set in stone!).
In order to avoid the following lighting issues, be sure to visit your possible ceremony sites at the time you’re envisioning having the ceremony so you know what it will actually look like (or portrait session sites if that’s what you’re in the midst of planning). Hot tip: if it’s a different time of year (say, you’re visiting in the winter but planning a summer wedding) just count backwards/forwards from sunset to make sure the timing matches up (ex: 4pm in November looks a lot like 7pm in July).

One partner is in full sun while the other is in the shade
Solution: Consider relocating the ceremony so the sun backlights you (eg highlights couple from behind)

Dappled light across one or both partners
Solution: Consider relocating the ceremony to a shadier spot, or lay a shade cloth above a structure (like a chuppah/arch) to create shade.

The sun’s beating down hard on couple or guests
Solution: Consider providing guests with parasols for shade and consider a chuppah or arch of some sort to provide shade for you. Ain’t nobody wanna get sweaty!

Scheduling your outdoor portraits early in the day
Particularly in open-air, shade-free areas. You don’t want to get sweaty, squinty, and sunburned before the ceremony even takes place, right? Solution: If envisioning portraits at this time, consider a shady spot—we’ll suggest ideal locations!

DJ Lights are positioned inconveniently
Solution: make sure they don’t locate any club lights or other uplights right behind your sweetheart table, as they will end up being a distracting in a lot of tender and important images (such as speeches), as seen here.

DJ Club Lights are happening too early
Solution: Make sure your DJ knows not to turn on his flashy club-style lighting until open dancing begins (see all the little red and green light spots on everyone in this image?). We’ve seen too many first dances/parent dances/speeches disrupted by weird spinning light patterns on faces, so be sure things don’t get clubby until everyone’s on the dance floor.
So that’s about it for your lighting lesson, friends! Hope that helps as you start planning out the ideal time of day and location for all your portrait and wedding plans. We’re of course always here to help and answer questions, but hopefully this will help get you on track to have the very best day!


Great job of breaking it all down. Although, regardless of the light, these images are all fantastic! I’m loving your artificial lighting style.
Aw, thank you so much, Robin! Hopefully it helps folks as they are thinking about the big picture. :)
I’m seriously bookmarking this to send to friends who are planning weddings! This is is such an amazing and comprehensive guide to the different types of lighting scenarios and how they can impact a wedding experience (and of course, the photos)!!
Aw, so many thank yous to you, Erin! I so appreciate that. It took a while to put together, but I so hope it will have a big impact with folks who are trying to make smart decisions about their day. Fingers crossed!
What a treat! You are definitely the photographer that knows amazing light, glad to have it all broken down with tips. Thank you!
Aw, how sweet ou are! Thank you so much!
You are the master of light! These are wonderful tips, thank you so much! I’m a sucker for the Golden Hour light!
You and me both! Thanks, Laura!
Love this post! Great way to educate clients and show how you can photograph gorgeous images in any light!
Thank you, so appreciate the feedback!
Oh what a perfect article to not only showcase how talented you are – capturing gorgeous shots in any type of light, but also offering such great advice for how couples can make specific decisions to allow for the best light and most gorgeous photos on their wedding day!
Aw, you’re so sweet Marie, thank you! Hoping it helps some couples as they navigate these wild lighting questions.